yum安装
你可以在你的 CentOS 系统中添加 openresty 仓库,这样就可以便于未来安装或更新我们的软件包(通过 yum update 命令)
①添加OpenResty仓库
运行下面的命令就可以添加仓库:
sudo yum install yum-utils
sudo yum-config-manager --add-repo
https://openresty.org/package/centos/openresty.repo
②安装OpenResty
然后就可以像下面这样安装软件包,比如 openresty
sudo yum install openresty
源代码编译安装(推荐)
OpenResty插件分为自带插件以及第三方插件,如果是自带插件直接激活就可以,如果是第三方插件需要手动下载插件添加进去,这里我们以本地缓存插件安装举例
①安装编译环境
yum install -y make cmake gcc gcc-c++ autoconf automake libpng-devel libjpeg-devel zlib libxml2-devel ncurses-devel bison libtool-ltdl-devel libiconv libmcrypt mhash mcrypt pcre-devel openssl-devel freetype-devel libcurl-devel lua-devel readline-devel curl wget
②下载最新版源码
mkdir /softwares/openresty
wget https://openresty.org/download/openresty-1.19.3.1.tar.gz
# 解压openresty
tar -zxvf openresty-1.19.3.1.tar.gz
③下载缓存插件
wget http://labs.frickle.com/files/ngx_cache_purge-2.3.tar.gz
 #解压缓存插件
tar -zxvf ngx_cache_purge-2.3.tar.gz
cd openresty-1.19.3.1/
mkdir modules
# 把刚解压的ngx_cache_purge移动到该目录下
④编译OpenResty
选择需要的插件启用, –with-Components 激活组件,–without 则是禁止组件 ,–add-module是安装第三方模块。
进入刚刚解压好的openresty-1.19.3.1根目录下执行命令
./configure --prefix=/softwares/openresty --with-luajit --without-http_redis2_module --with-http_stub_status_module --with-http_v2_module --with-http_gzip_static_module --with-http_sub_module --add-module=/softwares/openresty-1.19.3.1/modules/ngx_cache_purge-2.3
–prefix=/softwares/openresty: 刚自己创建的目录,用来存放编译后的openresty
–add-module=/softwares/openresty-1.19.3.1/xxx: 存放第三方插件的位置
这里禁用了 redis组件 并且 安装了第三方缓存组件
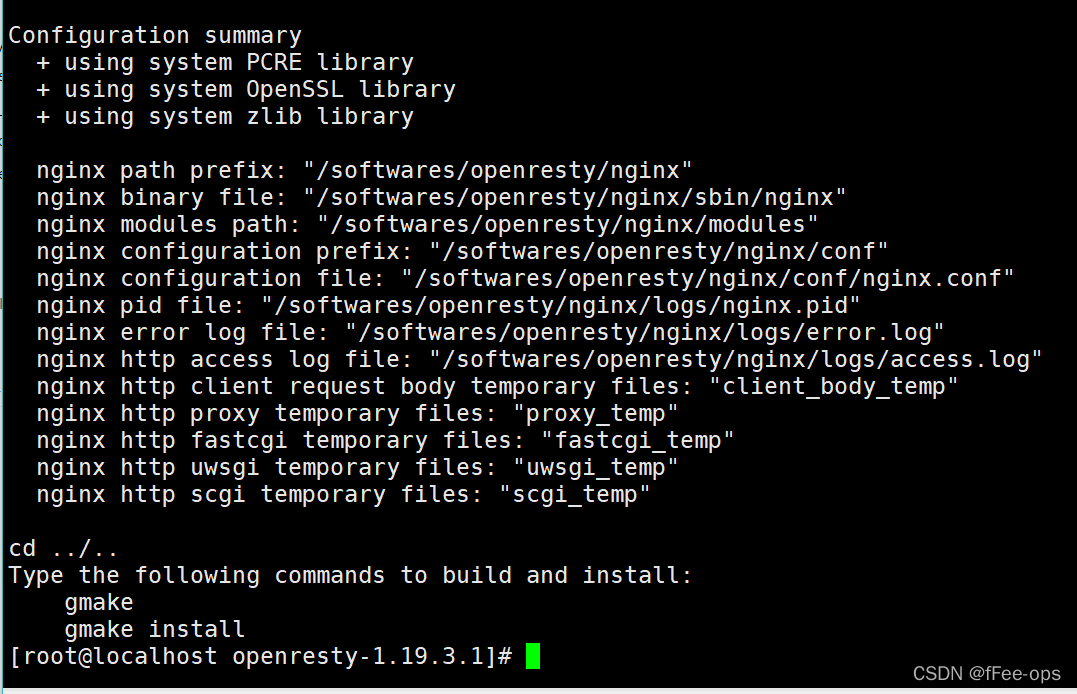
出现如下界面表示编译成功
⑤安装OpenResty
还是在当前目录下执行
gmake && gmake install
出现如下界面表示安装成功
⑥环境变量设置
vi /etc/profile
#添加配置
export PATH=$PATH:/softwares/openresty/nginx/sbin/
#刷新配置
source /etc/profile
⑦查看环境
# 小写v
nginx -v

查看安装的组件
# 大写V
nginx -V

运行测试
①创建Nginx配置文件
我们在 /softwares/openresty/nginx/conf目录下修改 nginx.conf 文件 代码如下
worker_processes 1;
error_log logs/error.log;
events {
worker_connections 1024;
}
http {
server {
listen 9000;
location / {
default_type text/html;
content_by_lua '
ngx.say("Hello, World!
")
';
}
}
}
②启动 OpenResty
nginx -c /softwares/openresty/nginx/conf/nginx.conf
接下来我们可以使用 curl 来测试是否能够正常范围
表示我们在配置文件写的 html 已正常输出。


